
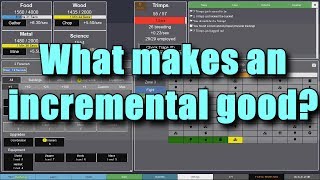
Improving an Incremental Game: Code Refactoring and Feature Implementation
This article details the process of enhancing an incremental game by refactoring code, implementing production layers, and adding a "buy new layer" button. While no layout changes are made in this iteration, the game becomes significantly more playable. A pre-coded version was created to avoid potential issues during the video recording, but the process is being replicated and explained here.
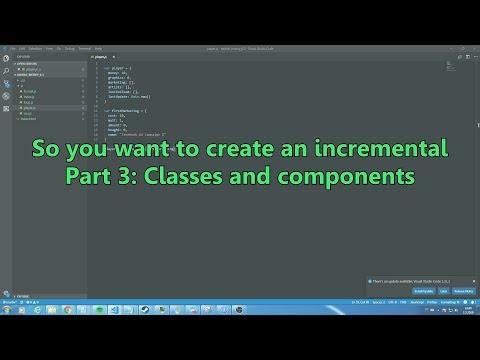
Refactoring the Generator Code
The initial generator implementation involved repetitive code. To address this, the generator is transformed into a class.
-
Creating a Generator Class: A
Generatorclass is created to encapsulate generator properties and functions. This avoids code duplication and promotes better organization. -
Understanding Classes: A class serves as a blueprint for creating objects. New instances of a class (e.g.,
new Car()) can be easily generated. Classes can have properties (likename,gasoline,mileage) and methods (functions) associated with them (likedrive()). The underscore prefix on properties (e.g.,_gasoline) conventionally indicates a degree of privacy. -
Class Constructor: The class constructor takes properties (props) as input and initializes the generator's attributes (e.g.,
this.name = props.name). -
canBuyGetter: A getter is added to determine if a generator can be purchased (get canBuy). It checks if the generator's cost is less than or equal to the player's money. -
buyFunction: Abuyfunction is implemented to handle the purchase of a generator. If the player can afford it, the function deducts the cost, increases the generator's amount, and adjusts the multiplier based on the number of generators owned. Multipliers increase production: after every 25 generators are purchased, production is multiplied by 3. The multiplier is multiplied by 5 after every 100 generators are purchased. -
productionPerSecondCalculation: This calculates the production rate of a generator. It multiplies the generator's amount by its multiplier. A division factor is applied to later-tier generators to prevent them from producing too quickly at the start. Each generator tier increases the divisor by a factor of 5, beginning at 5. -
createGeneratorFunction: This function generates new generators of a specific type. It takes a tier and a type (e.g., "marketing", "artist", "Load Box Team") as parameters.-
getColumnFromTypeFunction: Determines the column number based on the generator type using a switch statement. Marketing=1, Artist=2, and Load Box Team=3. -
generateGeneratorNameFunction: Generates a unique name for the generator based on its type. When all names in the relevant array are exhausted, a Roman numeral is added to differentiate iterations of the same generator.
-
Creating a Generator Purchase Component
To further reduce redundant code, a view component is created for the generator.
-
Creating
generatorPurchase.vue: A new Vue component,generatorPurchase.vue, is created. -
Component Template: The template includes the generator's name, cost, and a "Buy" button.
-
Props: The component accepts a
generatorprop, which contains the generator's data. -
Integrating the Component: The
generatorPurchasecomponent is integrated into the main view, replacing the previous HTML markup.
Implementing the Production Loop
This section focuses on making each generator produce resources for the next.
-
producePreviousGeneratorFunction: This function iterates through the generators and makes each generator produce resources for the next tier. It starts from the second tier and updates the amount of the previous generator based on the current generator's production per second. -
Applying Production: This function is called for each type of generator (marketing, artist, load box), linking their production. Marketing produces money, Artists produce graphics, and Load Box Team accelerates the other two generators based on the number of Load Box Team generators.
Implementing the "Add Generator" Button
Adds functionality for purchasing new layers of generators.
-
addGeneratorButton.vue: A new Vue component is created for the "Add Generator" button. -
Target and Cost: The component receives a "target" type string and calculates the cost of the next generator tier.
-
Function to get the Cost: A function is needed to get the cost of the generator. This function will take in the generator type as a parameter.
-
Button Logic: When clicked, the button checks if the player has enough resources to purchase the next tier. If so, it creates a new generator of the specified type and adds it to the appropriate array.
-
Integrating the Button: The
addGeneratorButtoncomponent is added to the main view, with specific targets. Thetargetprop will be one of the generator types.
Debugging and Testing
The process involves debugging and fixing errors that arise during implementation, such as:
-
Loading Order Issues: Ensuring that files are loaded in the correct order to avoid "undefined" errors.
-
Missing Templates: Adding the required template to the
addGeneratorButtoncomponent.
Next Steps
The next steps involve improving usability and aesthetics:
-
Consolidating Buttons: Combining multiple buttons into a single, larger button.
-
Visual Improvements: Enhancing the visual appeal of the interface.
-
Color Coding: Changing the button color based on affordability.
-
Bulk Buying: Adding the ability to buy more than one generator at a time.
-
Game Balancing: Further refining the game's balance and progression.
 {#
{#  {#
{#  {#
{#  {#
{#