
This article will guide you through setting up an AI automation that writes and posts content on X (Twitter), LinkedIn, Instagram, and Facebook. You'll learn how to eliminate the need for manual content creation and platform posting.
Free Resources to Get Started
A free document containing a complete automation setup and prompts is available via a link in the description. You won't even need to provide your email address. However, this guide highlights a crucial prompting mistake to avoid.
Overview of the Automation Process
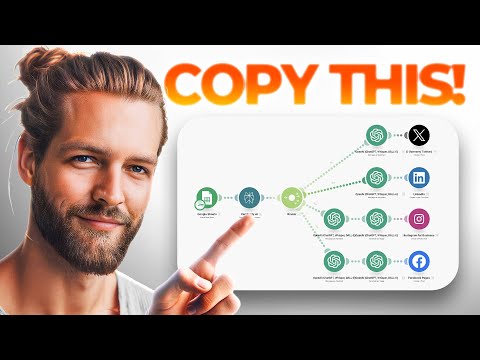
The automation utilizes Google Sheets, Perplexity AI, and multiple ChatGPT assistants within make.com to streamline content creation and posting.
-
Google Sheets: Serves as the central repository for articles.
-
Perplexity AI: Rewrites articles into concise summaries.
-
ChatGPT Assistants: Tailor content for each social media platform.
-
make.com: The automation platform that orchestrates the entire process.
make.com offers a free plan, but a special link in the description provides a free month of the Pro plan.
Step-by-Step Guide to Setting Up the Automation
This guide provides a step-by-step breakdown of how to build the automation from scratch. A Notion document with helpful resources is also provided in the description.
Step 1: Copy the Automation Blueprint
- Download the "Google Sheet to Social Media Blueprint" using the link in the description.
- In make.com, create a new automation.
- Click the three dots at the bottom and select "Import Blueprint."
- Choose the downloaded JSON file and click "Save."
While the blueprint is now imported, further setup is required for it to function correctly.
Step 2: Configure Google Sheets and Perplexity AI
This step connects the automation to your Google Sheets and Perplexity AI accounts.
Google Sheets Setup
- Open the provided Google Sheet template via the link in the document.
- Click "File" then "Make a copy" to create an editable version.
- Paste the URL of the article you want to share into the "URL" column.
Perplexity AI Setup
- In Perplexity AI, navigate to "Settings" and then "API."
- Purchase credits (e.g., $5) to generate an API key.
- Click "Generate" to create your API key.
Connecting Google Sheets and Perplexity AI to make.com
- In make.com, within the Google Sheets module, click "Add a new connection."
- Sign in with your Google account and authorize access to your Google Sheets.
- Specify the path to your Google Sheet. Ensure "Table contains headers" is set to "Yes" and "Rows limit" is set to "1."
- For Perplexity AI, click "Add a new connection" and paste your API key.
- In the Perplexity AI module, use the "Llama 3 sonar small" model. Set the content to "Summarize this and start your output with a headline", User tokens to 50,000, and Temperature to 1.
Step 3: Prompt ChatGPT for Social Media Content
This step configures ChatGPT assistants to generate platform-specific content.
Setting up ChatGPT Assistants
- Go to google.com and search for "ChatGPT assistant playground".
- Click the first link to access the OpenAI API assistant playground.
- Ensure you have added credits to your OpenAI account ("Settings" -> "Billing").
- Create assistants for Instagram, Facebook, LinkedIn, and X (Twitter).
- Give each assistant a name and specific instructions on how to act (e.g., "Tweet Oasis bot" with instructions to create casual, insightful tweets).
Testing Prompts in the Playground
- In the playground, select the desired assistant.
- Paste the output from Perplexity AI (the article summary) as the message.
- Run the assistant to see the generated output.
- Refine prompts to achieve the desired tone and style for each platform. For example, tweets should sound like a thought and be casual.
Avoiding Prompting Mistakes
A common mistake is using overly long prompts. Shorter prompts often yield better results. Long prompts can lead to ChatGPT hallucinating and incorporating unrelated information from examples.
Step 4: Setting up the ChatGPT Automations
- In make.com, open the ChatGPT modules within your imported blueprint.
- Click "Add a connection" and enter your OpenAI API key and organization ID (found in your OpenAI profile settings under "View project keys").
- Select the appropriate assistant bot for each platform (Twitter, Instagram, Facebook, LinkedIn).
- For the "Message" field, select the "content" from the Perplexity AI output.
Image Generation for Instagram and Facebook
- For Instagram and Facebook, include a "Generate an Image" module.
- Use the "Dall-E 3" model and connect it to your OpenAI account.
- Use a prompt like "Make an image based on this text:" and then select the output from the assistant as the text.
Step 5: Publishing to Social Media Platforms
- For each social media platform (X, LinkedIn, Instagram, Facebook), click "Add a connection" in the respective module.
- Authorize make.com to access your social media accounts.
- In the text/message field, select the output from the ChatGPT assistant module.
- For Instagram and Facebook, map the photo URL from the "Generate an Image" module to the photo/image field.
Running the Automation
After completing all setup steps, you can now run the automation.
- Paste a new article URL into your Google Sheet.
- In make.com, click "Run once."
The automation will then:
- Extract the article URL from Google Sheets.
- Summarize the article using Perplexity AI.
- Generate platform-specific content using ChatGPT assistants.
- Create images for Instagram and Facebook.
- Post the content to your social media accounts.
Conclusion
By following these steps, you can successfully automate your social media content creation and posting using AI. This saves time and effort while maintaining a consistent online presence.
 {#
{#